Adding Initial Inventory to C2W Inventory.
How to bring the initial inventory to the system
There are 4 basic steps:
⦁ Batch import the items.
⦁ Define the location.
⦁ Import initial inventory quantity to C2W.
⦁ Verify if the inventory has been imported.
Step 1: Batch Import the Items
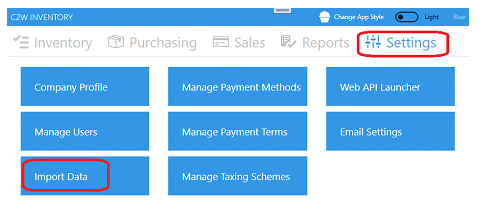
⦁ Go to Settings -> Import Data
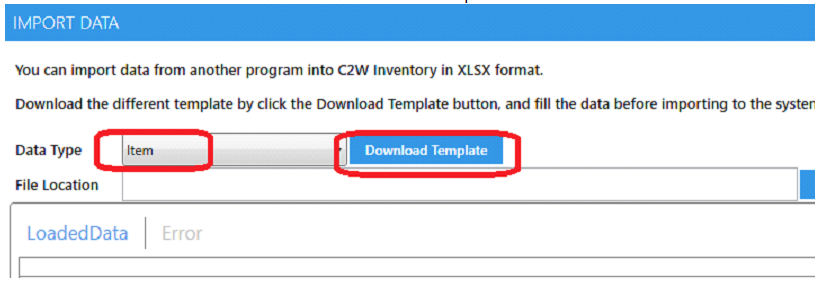
⦁ Select “Item” and click “Download” to obtain the item template in Excel format.
⦁ Fill in the necessary data in the item template and save the file to somewhere for the import.
Only Name and Price are required.

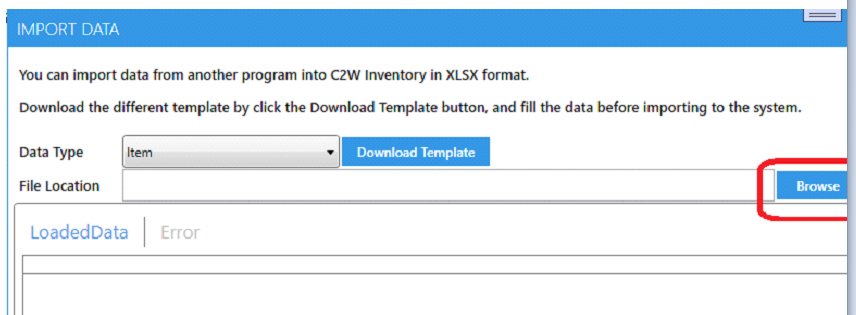
⦁ Save the file and click “Browse” to locate it.
⦁ After selecting the file, review the data and click “Import” to add the items to the system.

⦁ After being imported, a message will pop up. It confirms that the items have been imported into the system.

⦁ In case there are errors during the import, all the errors will be displayed in the Error tab. You can rectify those errors in the LoadedData tab directly then click Import button again.
Step 2: Define the Location
A location can refer to a room, an area, or even a specific shelf within a room. The primary objective of establishing various locations is to streamline the picking process. By assigning specific items to designated locations, pickers can efficiently navigate to the assigned location, facilitating a simpler retrieval process without the need to search through the entire warehouse.
⦁ Go to Inventory -> Manage Location
You can either add the location one by one, or batch import from the excel / notepad.
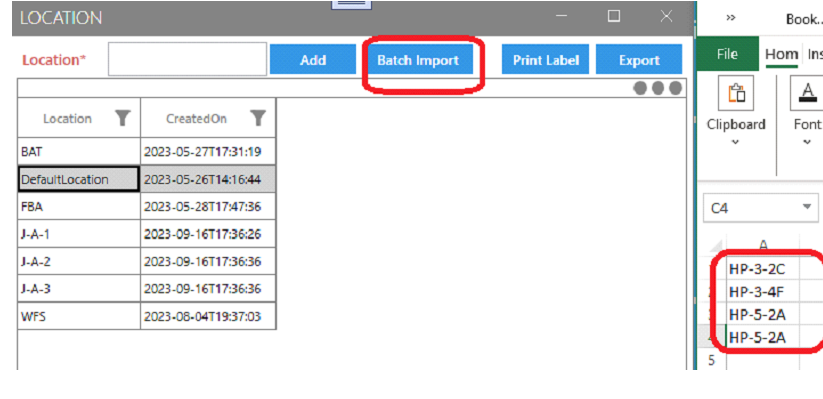
⦁ Batch import locations from excel / notepad.
⦁ Fill all the locations in the excel sheet.
⦁ Select all of them and click Control + C
⦁ Click Batch Import button on the screen. All the copied locations will be added to the system.
Step 3: Import Initial Inventory to the system.
⦁ Go to Settings -> Import Data module.
⦁ Choose “Init Inventory” and download the template.
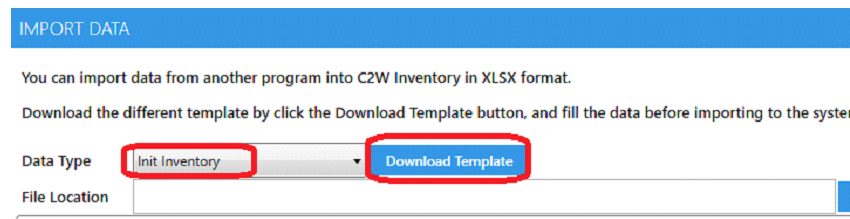
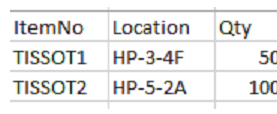
⦁ Fill in the Item No, Location, and Qty to the download Init Inventory template,
⦁ Save the template somewhere for the import.
⦁ Click Import to import the initial inventory into the system.

Step 4: Verify if the inventory has been imported.
There are two options available to verify if the inventory has been imported successfully.
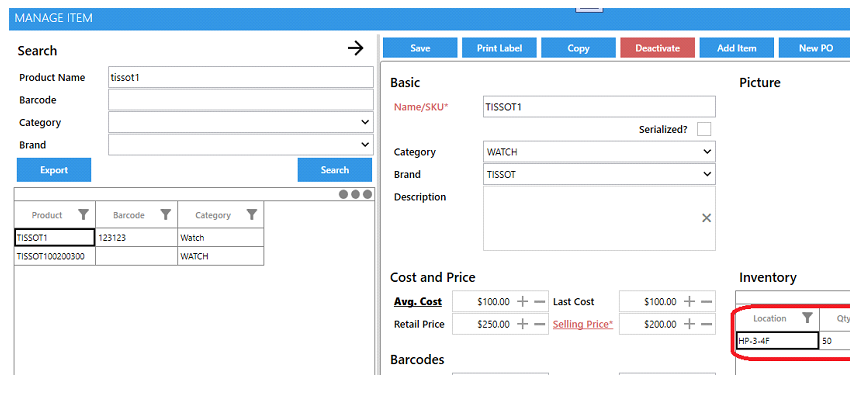
Go to Inventory -> Manage Item
or Inventory -> Current Stock module
The Manage Item module provides inventory information per item.
The Current Stock module provides inventory information for a whole bunch of items based on the search criteria.
⦁ Manage Item module,
⦁ Current Stock,

Note: For a visual walkthrough, watch our video on YouTube.
You can access the guide here: https://youtu.be/HgwdwdYDdkM