Welcome to C2W Inventory. In this guide, we’ll show you how to quickly set up C2W for your team and get your inventory management system up and running.
Set up your company profile
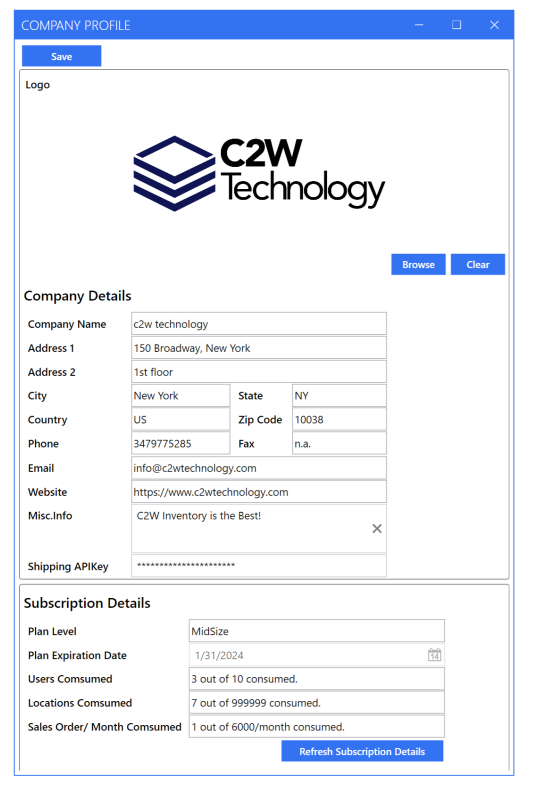
To begin, let’s personalize C2W for your company. This step is essential to align the system with your business identity.
- Go to “Setting” tab
- Click on ‘Company Profile’
- Click ‘Browse’ to upload your company’s logo.
- Enter your company name, address, and other contact details.
If you plan to purchase and print shipping labels directly from C2W, simply sign up for a free Easypost account. Obtain your Easypost API Key and enter it in the designated field. This integration allows you to access real-time shipping rates from all carriers
supported by Easypost. You can skip this step or return later to complete it.
Under ‘Subscription Details’, you can view your current plan and usage during the 14-day free trial. This section includes:
- Plan Level and Expiration Date.
- Number of Users, Locations, and Sales Orders/Month consumed.
- Note: If the subscription expires without payment, it will automatically downgrade to the Free version.
- The subscription details refresh every 6 hours upon login. Use the ‘Refresh
Subscription Details’ button for manual syncing. - Click ‘Save’ to confirm these changes.
Set up your system data
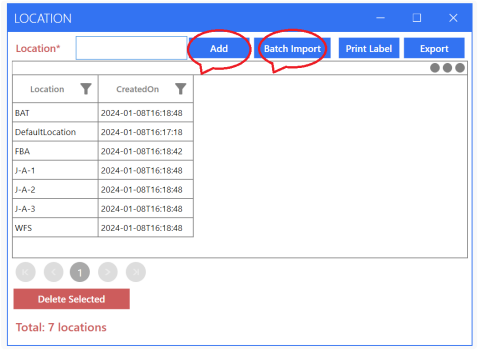
Go to the ‘Inventory’ tab to set up your Locations, Brands, and Categories.
- Add locations one by one, or copy and paste them in batches from an Excel/text file by clicking on ‘Batch Import’.
- The same method applies to adding Brands and Categories.
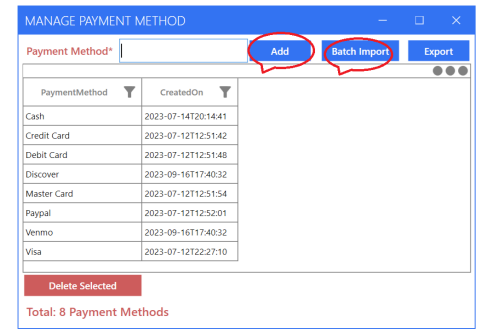
In the ‘Settings’ tab, you can manage your Payment Methods, Payment Terms, Taxing Schemas, and Shipping Methods. Just like adding locations, brands, and categories, you can add, batch import, delete, and export in an easy and straightforward manner.
Import Business Data
Finally, let’s import your business data, including customers, vendors, items, initial inventory, and open sales orders.
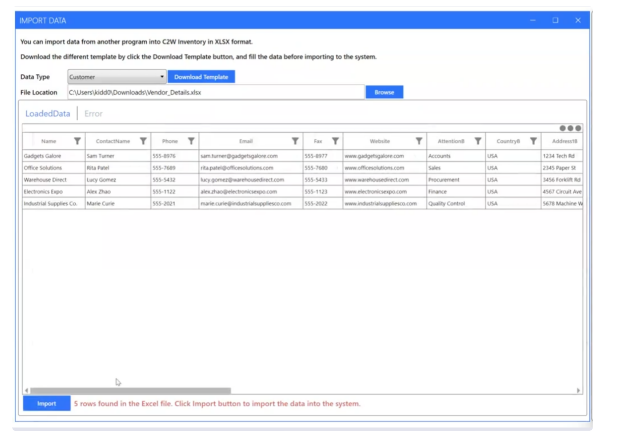
- Go to ‘Settings’ tab, then ‘Import Data’.
- Choose the Data Type and click ‘Download Template’ to get a pre-defined Excel template.
- Click ‘Browse’ to upload the filled Excel file; the data will appear in the ‘LoadedData’ tab.
- Click ‘Import’. The system will validate the data. If errors are found, they will be displayed in the ‘Error’ tab. Errors can be fixed directly in the ‘LoadedData’ tab or in the Excel file.
- After corrections, click ‘Import’ again or re-upload the file.
That’s it! You’re now all set to use C2W Inventory to its full potential.
Note: For a visual walkthrough, watch our setup video on YouTube. You can
access the guide here: https://youtu.be/aOBB7ldfPyo