

Simplify your inventory management and keep every item under control
C2W Inventory Management Software gives small and growing businesses one place to control stock, orders, and locations in real time. With smart inventory tracking, real-time visibility, and cloud-based Windows, Android, and web apps, you always know what you have, where it is, and when to reorder.




Complete Inventory Management Solution from Sales to Shipping
-
Inventory Management
-
Purchase Management
-
Sales Order Management
-
Warehouse Management
-
Manufacturing Management
-
Dashboard Overview
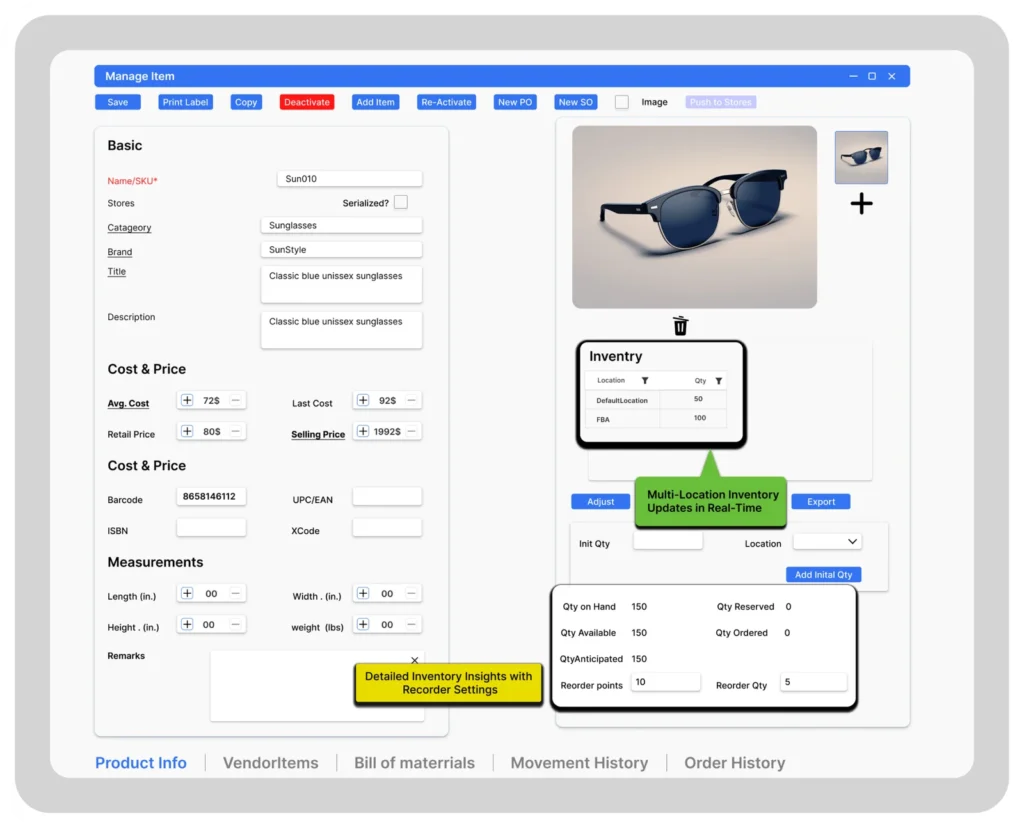
Inventory Management
Keep track of your products, from receiving to sale. Set up alerts to reorder items automatically when they’re running low, ensuring you never face stockouts. Simplify stocktaking with barcode scanning and real-time updates.
- Real-Time Inventory
- Multi-location support
- Reorder points
- Barcode label generation
- Stock adjustment & transfer

Purchase Management
- Low Stock Alerts
- Vendor Management
- Barcode Easy Receiving
- Payment Management
- Cost Tracking

Sales Order Management
- Order Management
- Integrated Shipping Carriers
- Automatic Packing Slips
- Partial Shipping
- E-commerce integrations

Warehouse Management
Manage space and track inventory within your warehouse with ease. Organize products efficiently, automate sorting and retrieval, and accelerate order fulfillment processes to enhance productivity and accuracy.
- Multi-Bin/Multi-Location Tracking
- Mobile Barcode Scanning
- Serial Numbers Tracking
- Stocktake
- Label Printing

Manufacturing Management
Coordinate production schedules, track material usage, and control the manufacturing process from start to finish. Ensure timely production and reduce downtime with streamlined operations and clear visibility into every stage.
- Bill of Materials
- Prioritize manufacture orders
- Material Usage Tracking
- Work Order Management
- Real-Time Reporting

Dashboard Overview
- Open Sales Orders View
- Open Purchase Orders View
- Stock Reorder Alerts
- Sales & Purchase Order nsights
- Customizable Privot Tables

Barcode Inventory Management for On-the-Go Tracking
Whether you’re scanning production items, shelves, bins, or aisles in your warehouse or across various locations, C2W Inventory enables precise and accurate tracking and management of your inventory. Our system is
compatible with any Android device, simplifying barcode scanning and inventory management on the move.
- Configure and print barcode labels and sheets easily.
- Handle warehouse tasks from anywhere.
- Easily pick, receive, transfer, and adjust stock while moving
- See where products are in real time, across all locations
Barcode Inventory Management for On-the-Go Teams
Scan. Track. Adjust. Anywhere
Whether you’re managing shelves in one warehouse or scanning across multiple locations, C2W inventory gives you powerful barcode tracking on both Android and Web App-right from your phone, tablet, or desktop.
- Easily configure and print barcode labeis & sheets
- Perform warehouse-tasks from any device-anywhere
- Pick, receive, transfer, and adjust stock on the go
- See real-time inventory across all your locations
Works seamlessly on Android devices and through your browser-no installations needed.
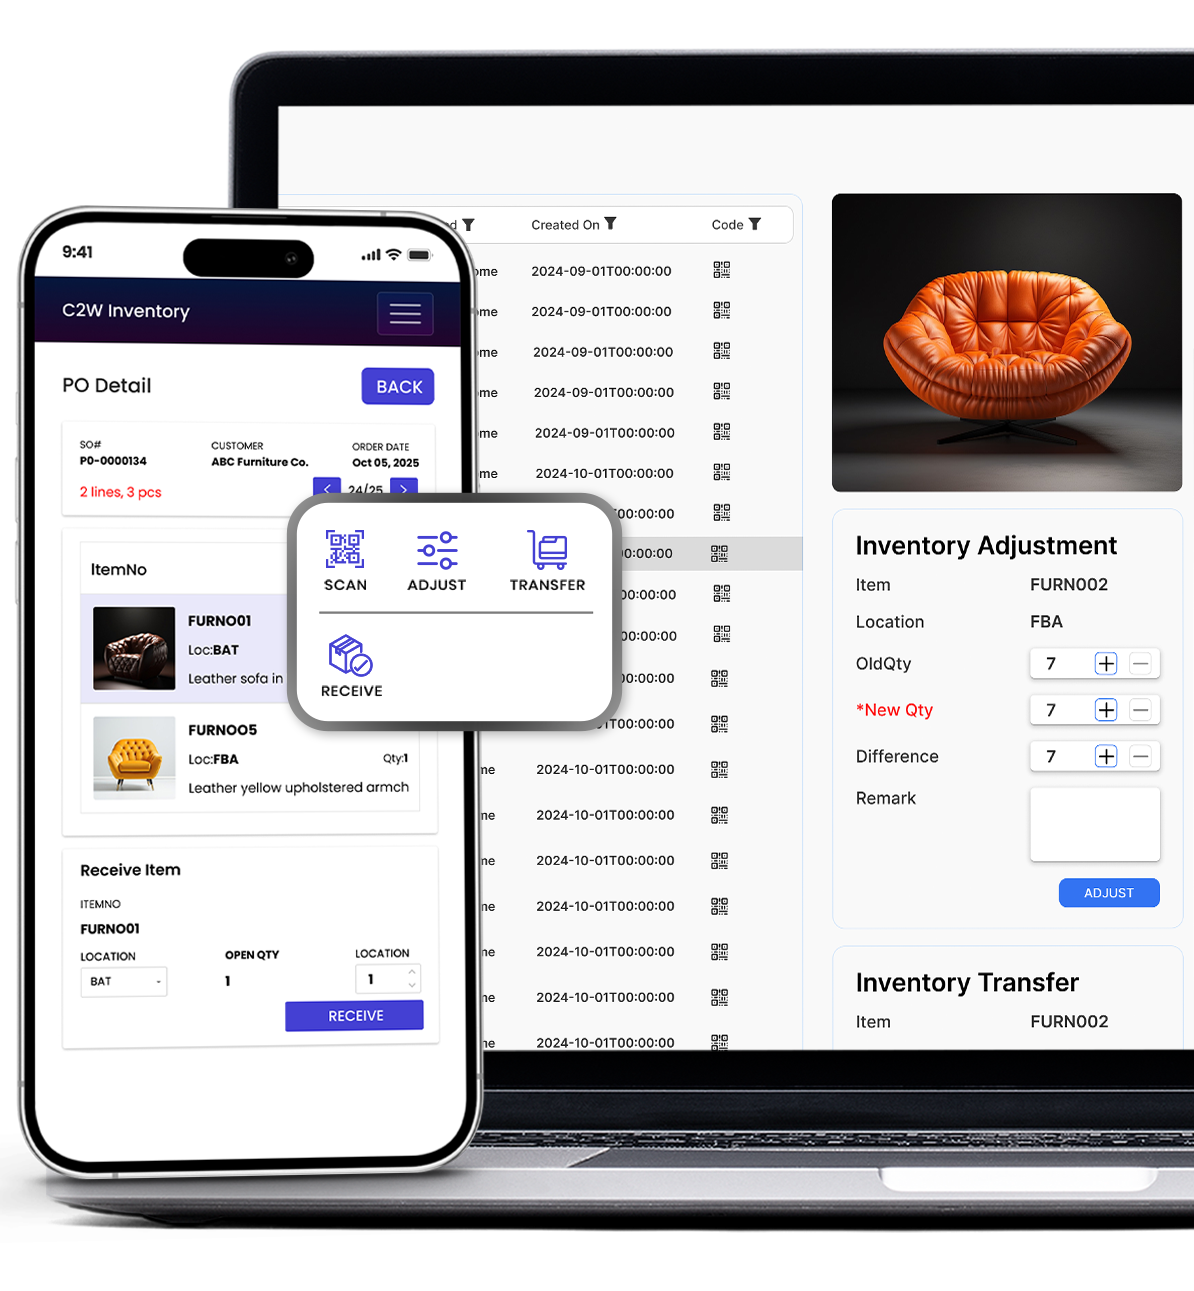
Bring Your Production and Inventory Together in One Place
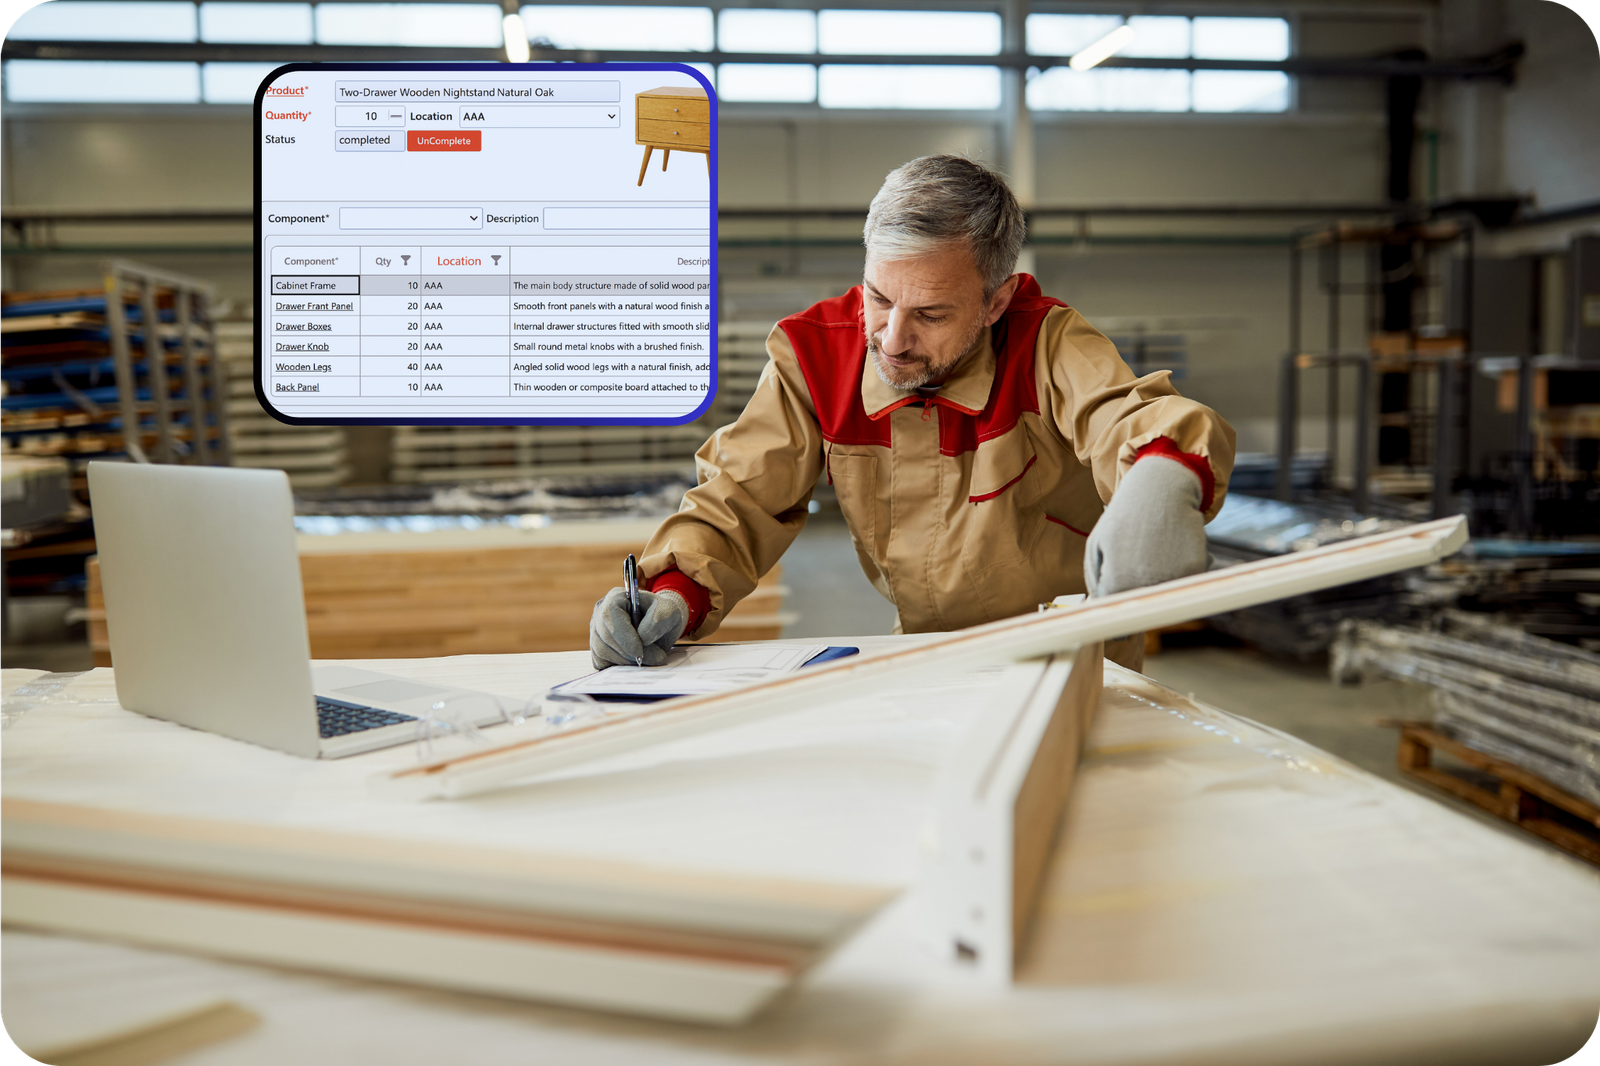
For manufacturers and businesses that assemble or bundle products, C2W Inventory goes beyond inventory management alone. Our built-in manufacturing tools help you plan production, manage materials, and track every stage, from raw components to finished goods, all in one connected system. Whether you’re assembling kits, managing custom builds, or producing in batches, you’ll always know what’s available, what’s in progress, and what’s ready to ship.
C2W Manufacturing
Whether you’re managing shelves in one warehouse or scanning across multiple locations, C2W inventory gives you powerful barcode tracking on both Android and Web App-right from your phone, tablet, or desktop.
- Streamline production and reduce manual work with connected manufacturing and inventory data.
- Stay on top of every order – know what’s in progress, what’s done, and what needs materials.
- Eliminate stock surprises with automatic updates when parts are used or products are completed.
- Build with confidence – manage assemblies, kits, or multi-level products with full visibility.
- Deliver faster and operate smarter by connecting your shop floor to your stockroom in real time
Simplify inventory management across diverse industries, from Ecommerce and Retail to Manufacturing and beyond.
Scalable solutions from C2W Inventory meet the unique needs of any industry, streamlining operations for businesses large and small. Whether your requirements are simple or complex, our system effectively manages your inventory.
Why Business Love C2W Inventory
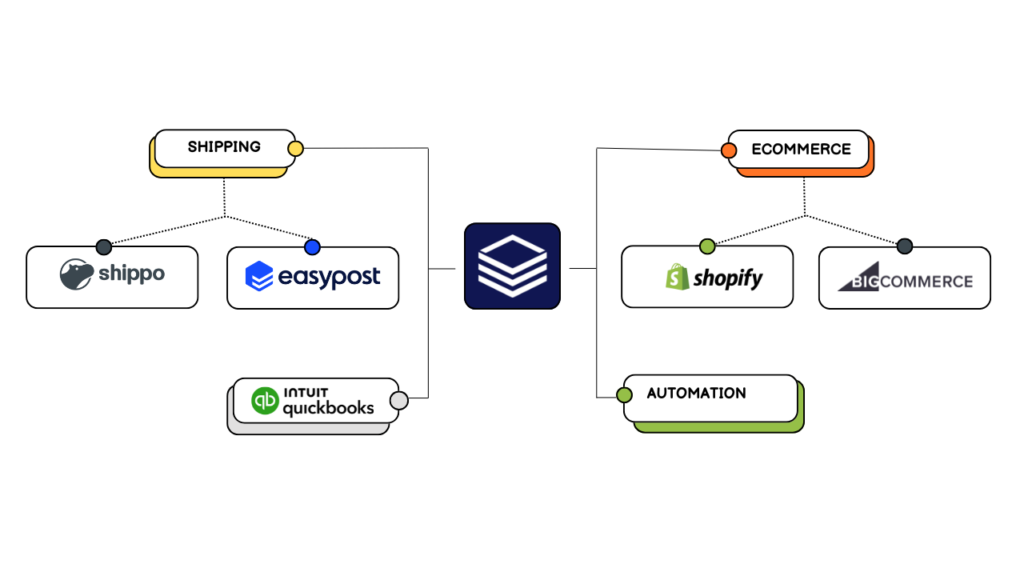
Unify Your Business Tools with C2W Inventory
From the warehouse to your customer’s front door, feel
secure knowing Inventory Management Software has you covered every step of the way.
- 14-day free trial
- No credit card required
- No onboarding fee
- Cancel anytime
