
Managing inventory efficiently starts with one simple thing: bin location labeling. However, it is one of the most underrated principles in warehouse management.
A proper warehouse bin locations labeling system helps employees find products faster, reduces picking errors, and makes training new staff much easier.
In this blog, I’ll walk you through the five key components of a warehouse bin location label and share best practices to make your warehouse layout both intuitive and scalable.
Prefer to watch? Here’s the full video:
Why Bin Location Labels Matter
If your bins and racks aren’t clearly labeled, your warehouse can quickly turn into chaos. Employees waste time searching for items, products get misplaced, and mistakes creep into your fulfillment process.
Imagine that an employee, John, has to pick items for an urgent order, but the bins are unlabeled or mislabeled. John ends up spending extra time wandering the aisles, picking the wrong products, and needing to double-check everything.

This slows down the entire operation and increases warehouse picking errors. Without clear labels, even experienced workers are at risk of failure, which results in costly delays and reduced overall productivity.
When there is a consistent bin location labeling structure, the story becomes a lot different. You will be able to:
- Speed up picking and restocking
- Improve accuracy across your team
- Make onboarding new employees simple
- Keep your warehouse organized as you scale
Let’s reconsider the example of John. Now that all the warehouse bin location types are labelled, John can identify the exact bin he needs, which cuts down the search time. Moreover, it boosts productivity, lowers errors, and makes the entire fulfillment process smoother.
Read more: Picking by Orders vs. Picking by Items: Which Strategy Fits Your Warehouse?
The 5 Components of a Bin Location Label
The bin location labeling is not just about sticking a tag on a bin or shelf. A traditional bin location label has five key components that work together to create a logical system for identifying every storage spot in the warehouse.
Let’s look at all five components of bin location labeling and understand how they break down the warehouse into manageable sections:
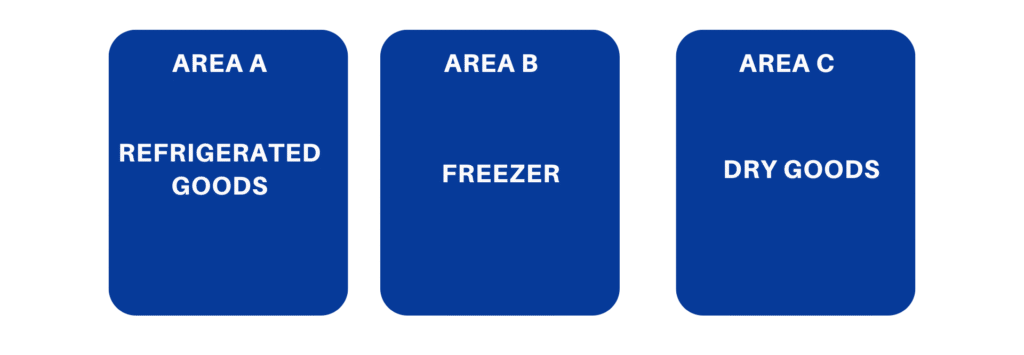
1. Area
Divides the warehouse into major sections. For example:
- Area A = refrigerated goods
- Area B = freezer
- Area C = Dry goods
If you manage multiple warehouses, each building can be labeled as its own area.
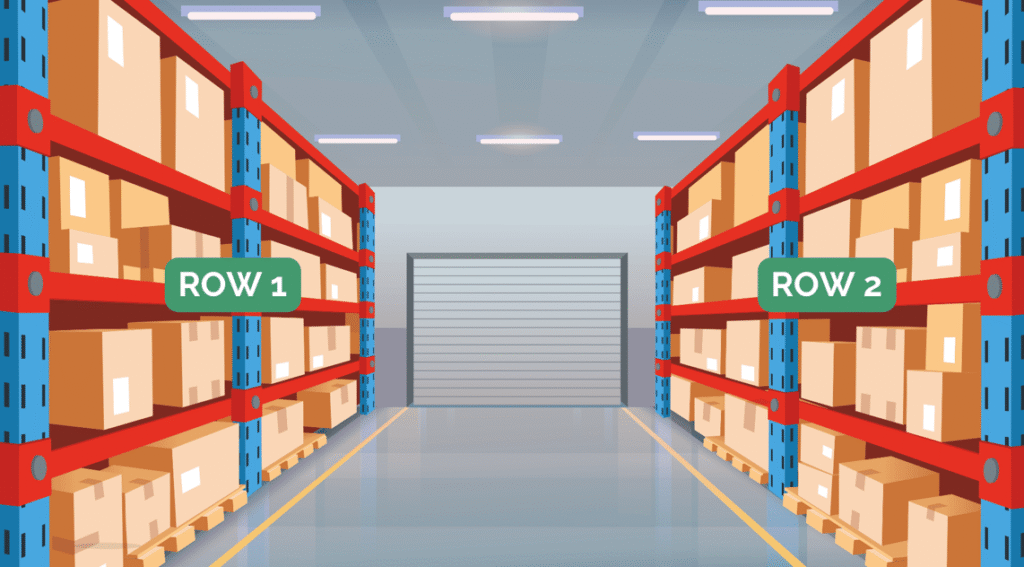
2. Row
Each side of an aisle counts as a row. For example:
- Row 1: The left side of Aisle 1
- Row 2: The right side of Aisle 1
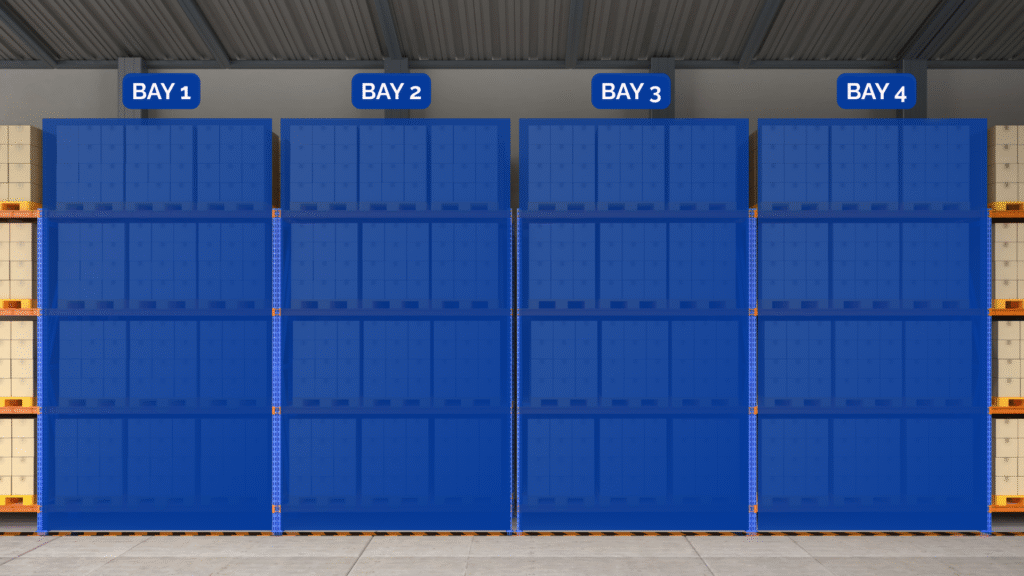
3. Bay
This is a vertical segment of a rack (between two beams), numbered sequentially within each row.
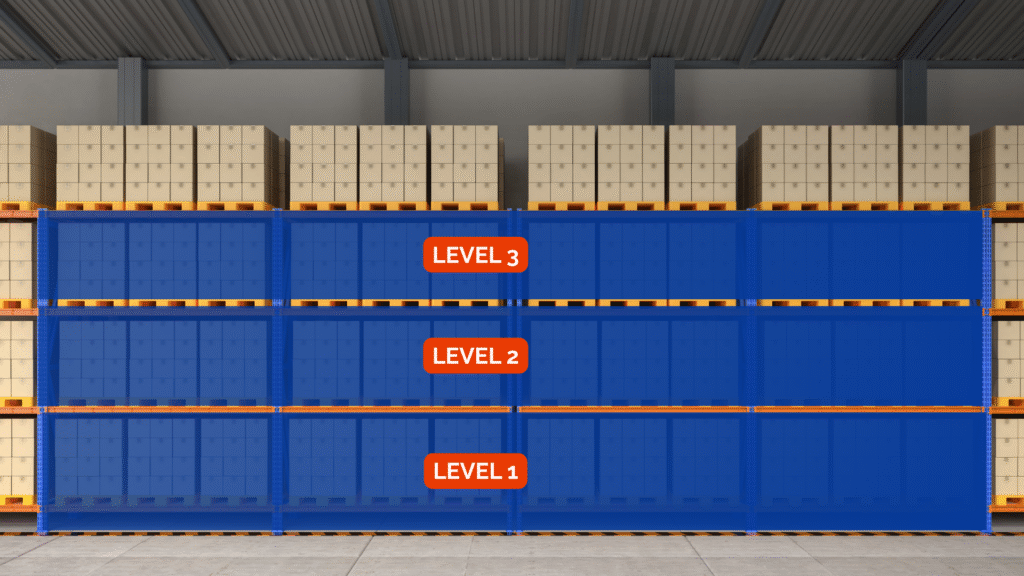
4. Level
It indicates the vertical position within a bay. It starts at Level 1 on the floor and moves to higher levels (2, 3, 4…) for bulk or overflow storage.
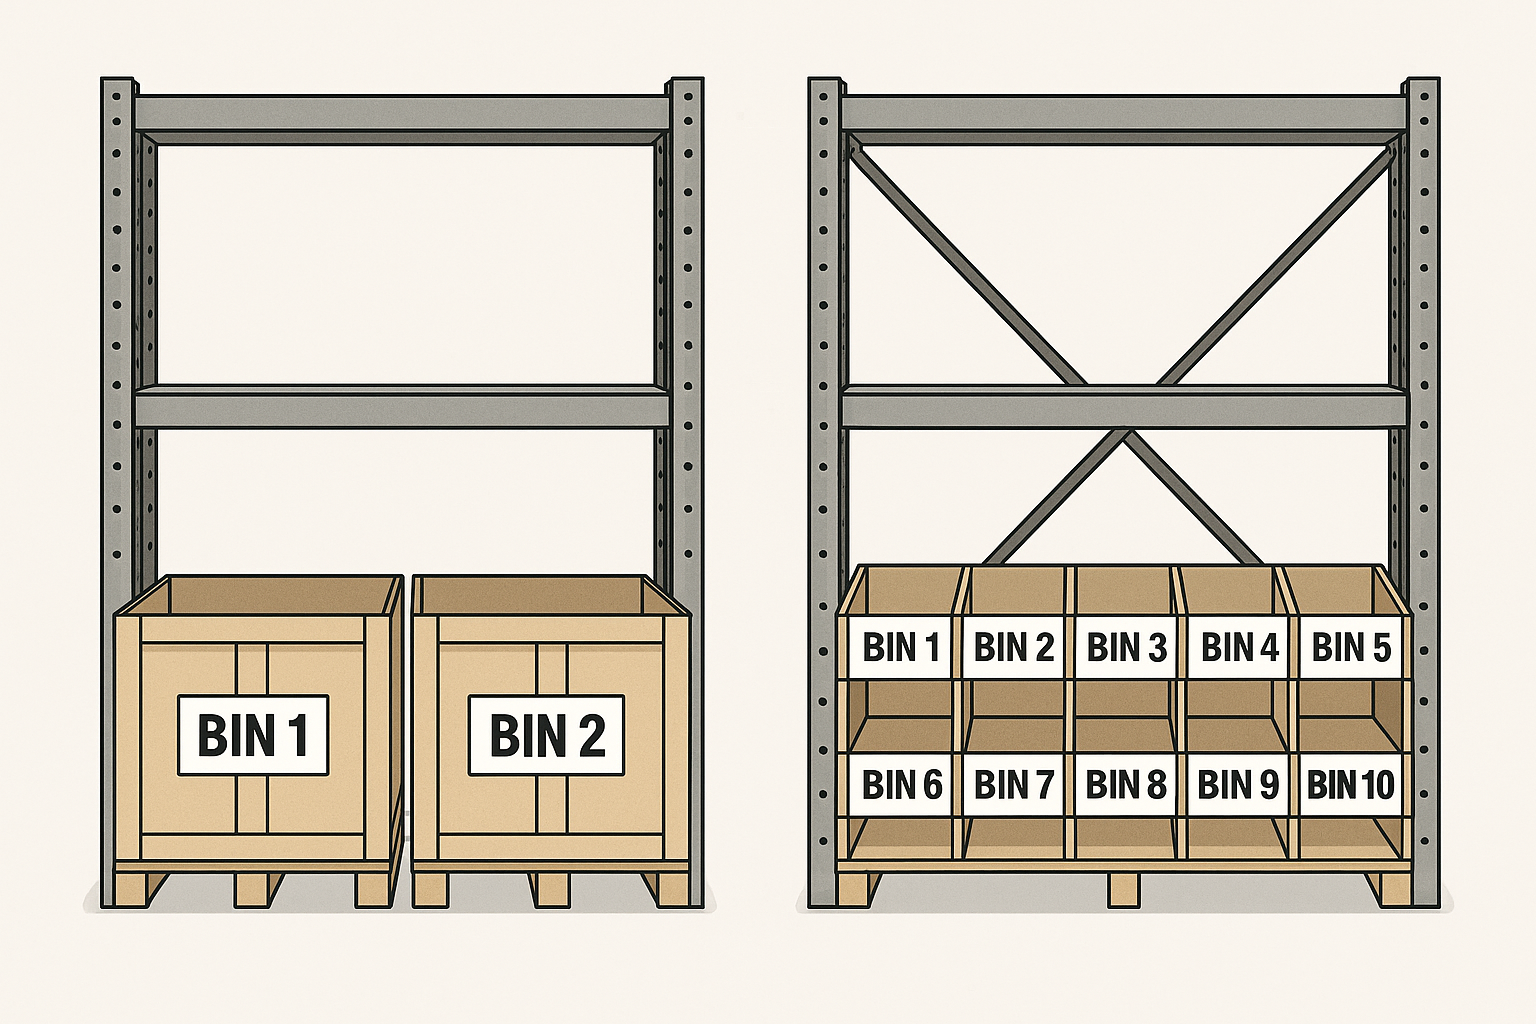
5. Bin (Position)
It is the smallest unit within a level, such as a pallet spot or plastic container. For example, if there are two pallet spots at one level, they can be labeled Bin 1 (left) and Bin 2 (right). Smaller products may have several bins numbered from 1 to 10, which makes it easy to find exactly where each item belongs.
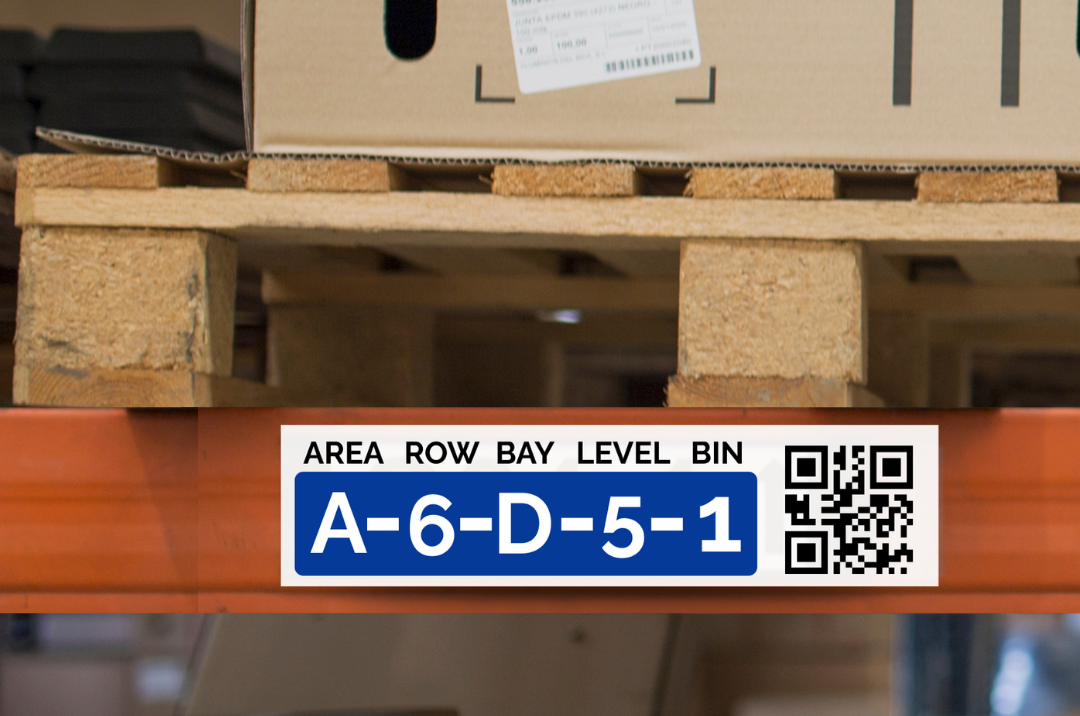
Example of a Bin Label
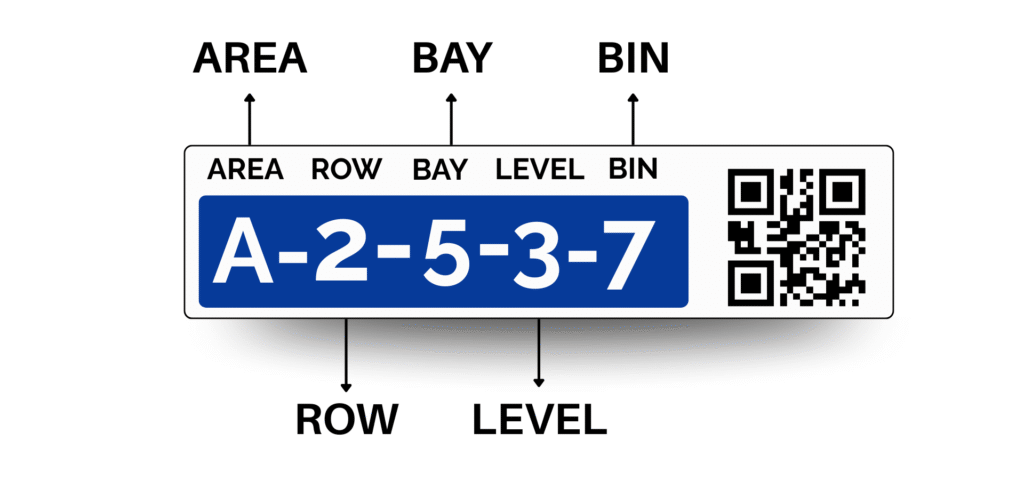
Here’s an example of a bin location code and what each part means:
A-02-05-03-07
- A = Area A: The main section of the warehouse this bin is in, such as refrigerated goods or dry storage.
- 02 = Row 2: The specific aisle side where the bin is located.
- 05 = Bay 5: The vertical rack section within the row, numbered sequentially.
- 03 = Level 3: The shelf height or level inside the bay, with Level 1 as the floor.
- 07 = Bin 7: The exact position within the level, like a pallet spot or container number.
This code provides a clear “address” so workers can quickly find or restock items with precision and ease.
Best Practices for Warehouse Bin Labeling
Now that we know the components of a warehouse bin location label, it’s essential to follow best practices to maximize its effectiveness:
- Use durable labels – Print large, clear labels that can withstand warehouse conditions.
- Include barcodes or QR codes – This speeds up scanning and reduces manual errors. In fact, barcode systems can lower inventory errors by as much as 30%.
- Stay consistent – Always follow the same Area → Row → Bay → Level → Bin format.
- Avoid vague divisions – Don’t leave large, unmarked spaces. Each bin should be clearly separated.
- Train your team – Walk new employees through the system so they can pick it up on day one.
Wrap-Up
Labeling your warehouse bins properly is the first step toward smooth and efficient operations. Start with the five-component structure and adapt it to your unique warehouse setup. Remember that the goal is to make your warehouse bin location system logical, scalable, and easy for anyone to understand.
📹 Don’t forget to check out the full video guide above for visual examples.