



How to Manage Categories in C2W Inventory
Categories help organize products into groups, making it easier to classify and manage items in C2W Inventory. Once a category is created, it can be assigned to items when creating or editing product information.
Open Manage Categories
Navigate to Settings > Manage Categories. The Manage Categories screen displays your existing categories and provides options to add, batch import, export, or delete categories.
Add a Category
To create a new category:
The category is immediately saved and added to the list. Once created, the category is available for selection when creating or editing items.
View and Filter Categories
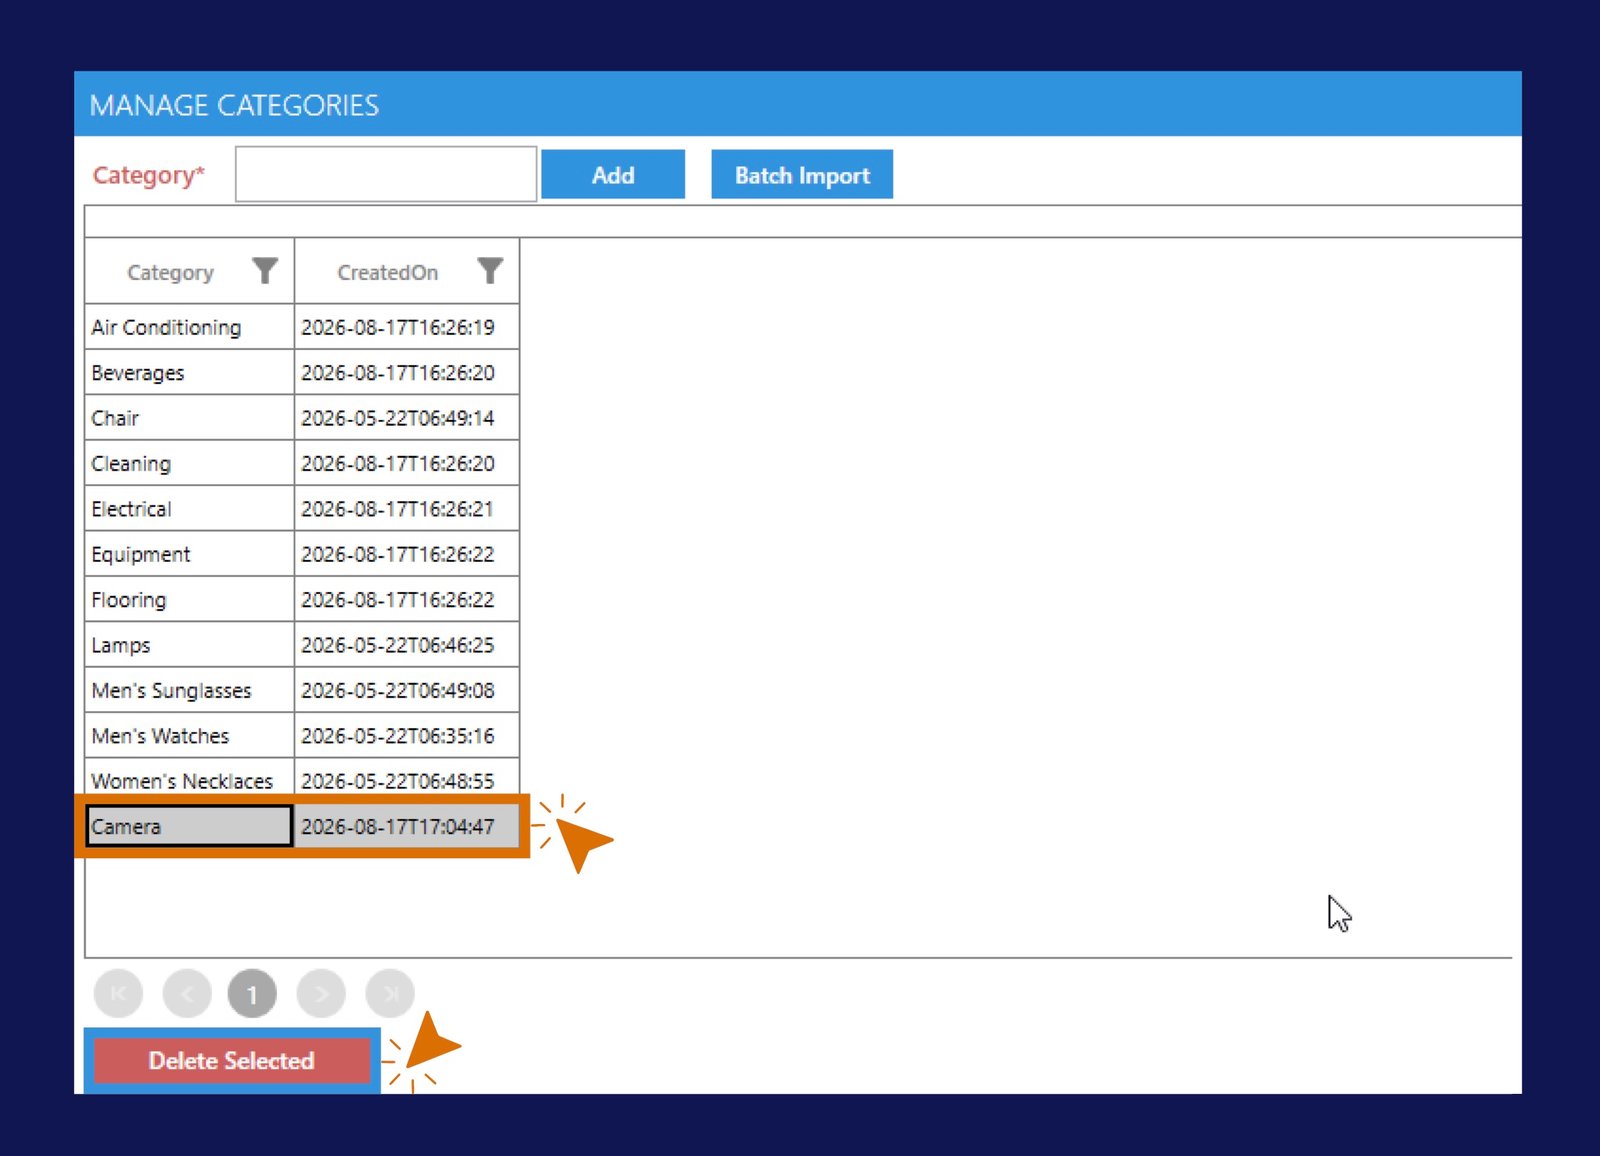
Existing categories are displayed in the Manage Categories list. The list includes:
- Category – The category name.
- CreatedOn – The date and time the category was created.
Use the filter icons in the column headers to quickly find or filter categories in the list. The total number of categories is displayed at the bottom of the screen.
Export Categories
Click Export to export the existing category list. This is useful when you need to review your category data outside of C2W Inventory or keep a copy of your current category list.
Delete a Category
To remove a category:
Important
Before deleting a category, make sure it is no longer needed or assigned to products.
Batch Import Categories
Need to add multiple categories at once? Use Batch Import to import a list of categories instead of adding them individually.
See How to Batch Import Categories for complete instructions.